
DevOping 5: AWS
This is not intended to be a guide. I’m sure that everything explained here can be done in a better/easier/more efficient way. Here, I will explain the whole learning process and the solutions I found that could solve my problems.

We have an application and a set of github actions that create docker images and upload them to my Docker Hub repository. It’s time to finish this by making this app public. I wanted to put my hands on AWS, so I decided to host my app there.
In this post I will explain how I configured my AWS environment to host my app. I will not get into details with the account creation steps.
EC2 Instances
I will host the applications in EC2 instances, which are virtual machines. I used two of them, one for the backend + database and another one for the fronted. I know that the Database should be hosted on another server, but I was using AWS free tier so I didn’t want to exceed with the resources spent.
For the EC2 instances, I used the default configuration with the Amazon Linux image. I had to create RSA keys to allow remote connection using SSH. For each instance, a security group is created. We will talk about security groups later.

When you stop and start an instance again, the IP may change. This was a problem because I need to know the IP if I want the frontend app to communicate with the backend and the IPs are defined in the environment variables. Morover, we need to expose the frontend server and the backend API. The best way to mange this is using a load balancer.
Load Balancer (ELB)
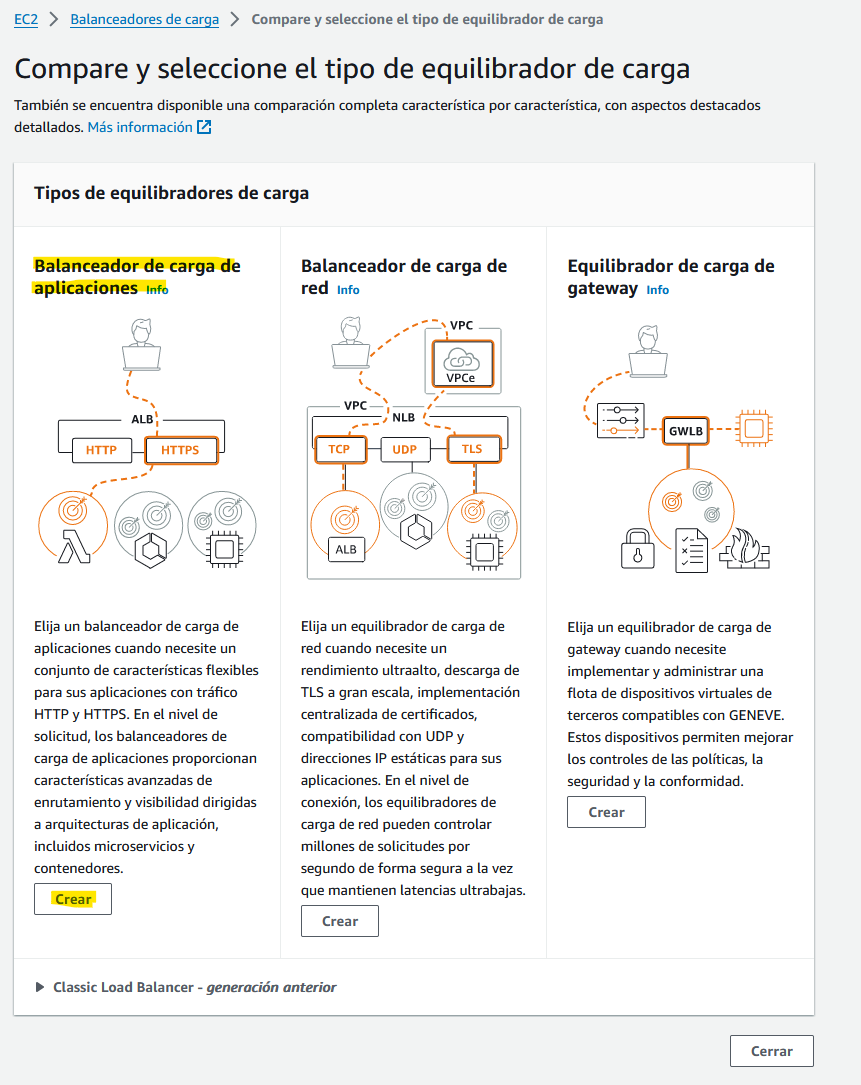
As the name suggest, a load balancer helps to distribute application traffic to different EC2 instances and “balance” it. However, we won’t use it to distribute the load but to redirect the traffic to the correct endpoint (thats also known as an Aplication Load Balancer)
We will choose this option and we can go with the default configuration, we will change it later:
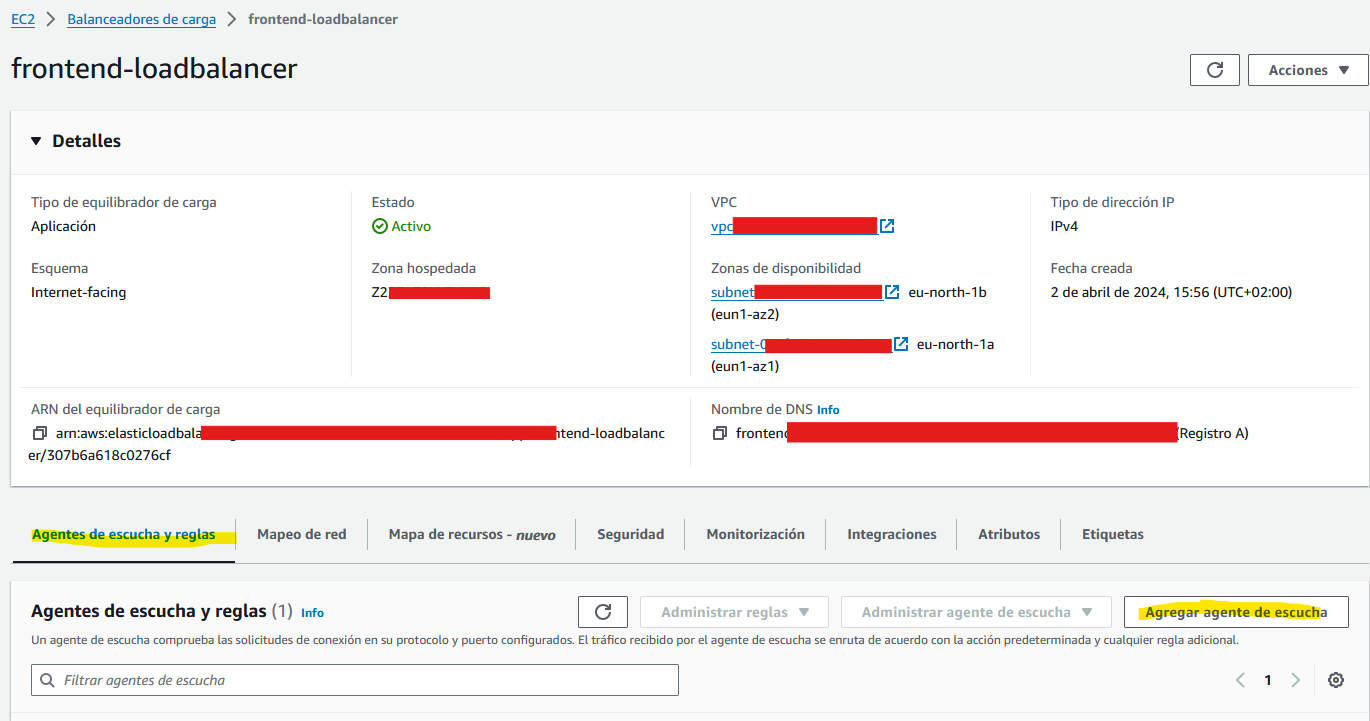
Once we have our load balancer, we will create a listener that listens to port 443 (HTTPS)
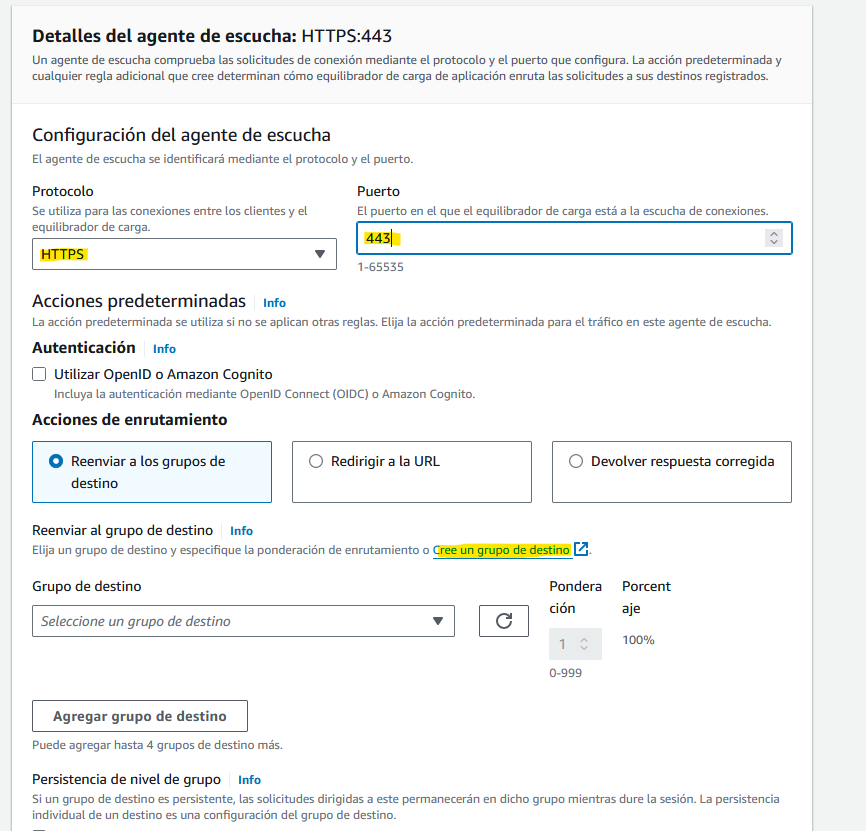
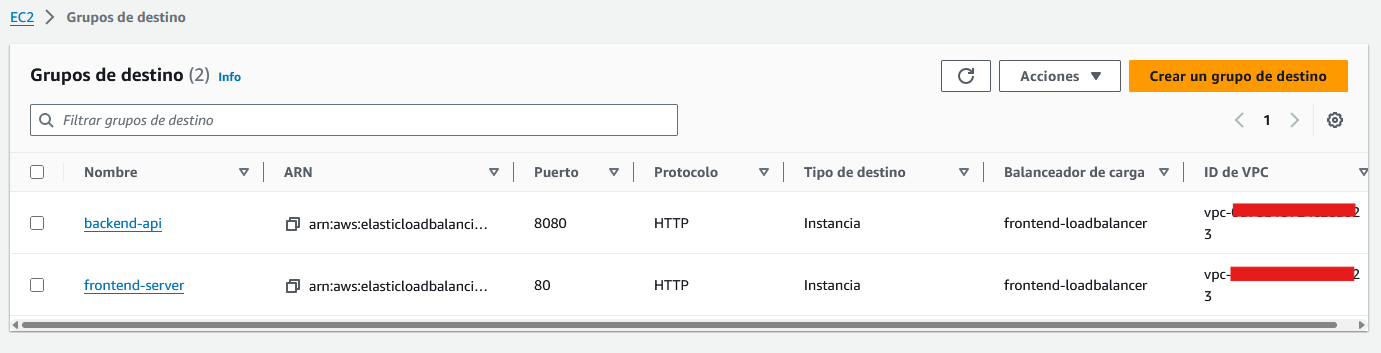
We will also need to create “destination groups”. A destination group is where the load balancer will redirect the traffic (following some criteria that we will specify).
I created two destination groups. One for the frontend web and the other one for the API. The api connections will go to the port 8080 and the frontend server will listen to the port 80:
Then we can define the criteria that will be used to redirect the trafic to one destination group or the other one. I changed all my api endpoints to inculde /api/ , so I can use this as a criteria:
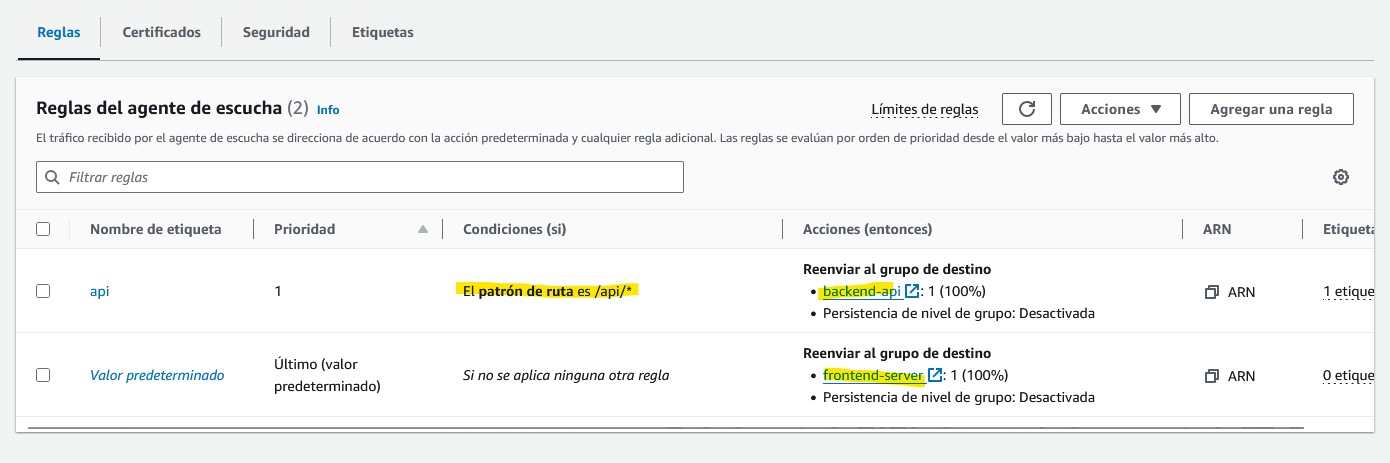
If the endpoint contains /api/* , it will send the request to the API EC2, otherwise it will be sent to the frontend EC2.
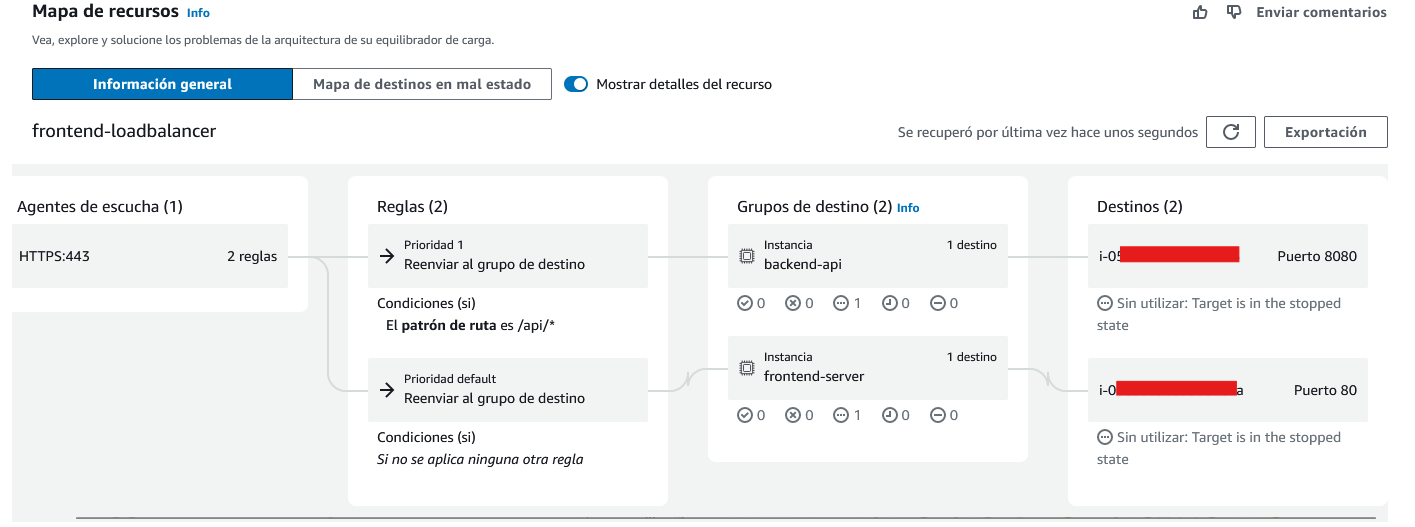
This schema represents the configuration of this load balancer:
Security Groups
AWS lets you protect your resources by using security groups. A security group is a firewall that protects an instance controlling the inbound and outbound traffic.
I have a total of 4 security groups (1 for each EC2 instance, +1 for the load balancer, +1 for the VPC where the EC2 instances reside and permits all trafic).
Load Balancer security group: The load balancer is what will be exposed to the internet and we only want HTTPS traffic, so I only have one allow rule that permits HTTPS traffic to the 443 port (I hardcorded my IP so I also only allow traffic from my home, but the idea is to make it public):

Frontend security group:
Remember that the frontend server listens to port 80 (the load balancer redirects trafic from its port 443 to the frontend port 80). We only want connections to that port that come from the load balancer and this is something we can do by selecting the load balancer security group as an origin:
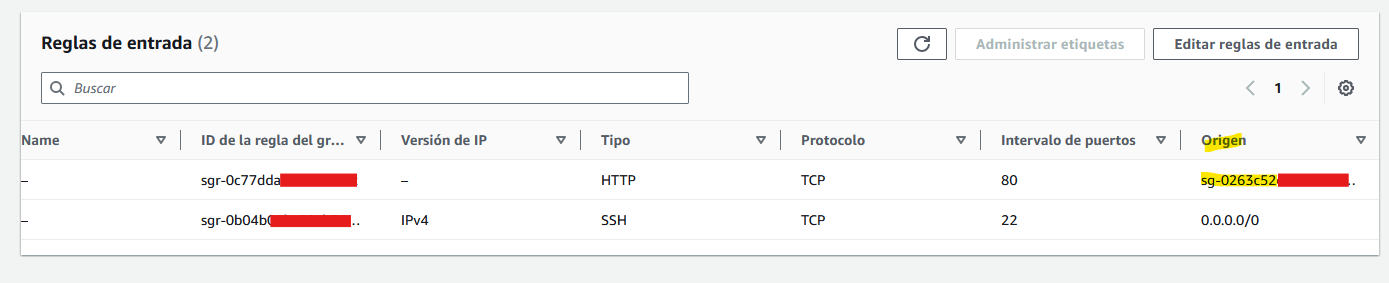
We also need to establish remote sessions to the instance, so we will allow SSH connections by exposing the port 22.
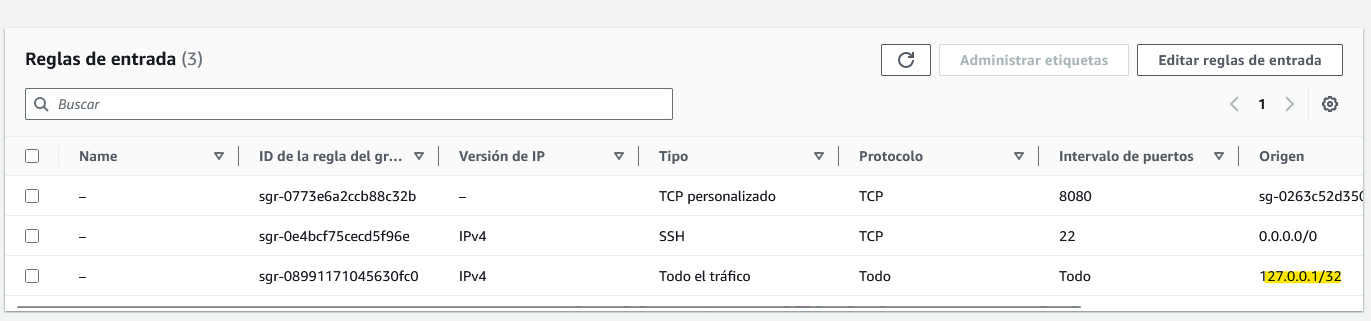
Backend security group:
This one is really similar to the frontend security group, but using port 8080. In addition, since it also has the database, we will allow connections from the localhost, since that server will be doing requests to itself.
Certificate Manager
To allow secure connections (HTTPS) we need a valid TLS Certificate. AWS “Certificate Manager” issues certificates that can be used in your environments, so I bought one domain using GoDaddy and requested a certificate using the Certificate Manager functionality.
In order to get the TLS certificate, AWS needs to validate that the domain is yours, so it requests you to add a specific entry in your DNS configuration to ensure that you control that domain.
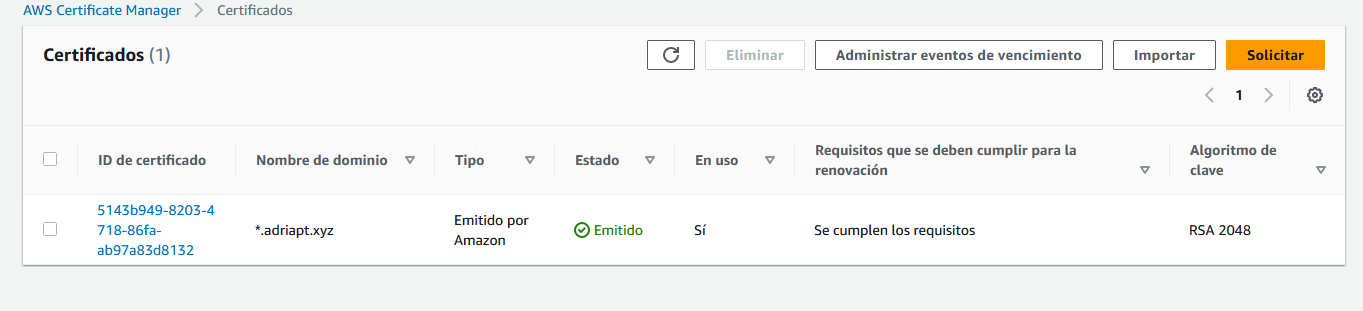
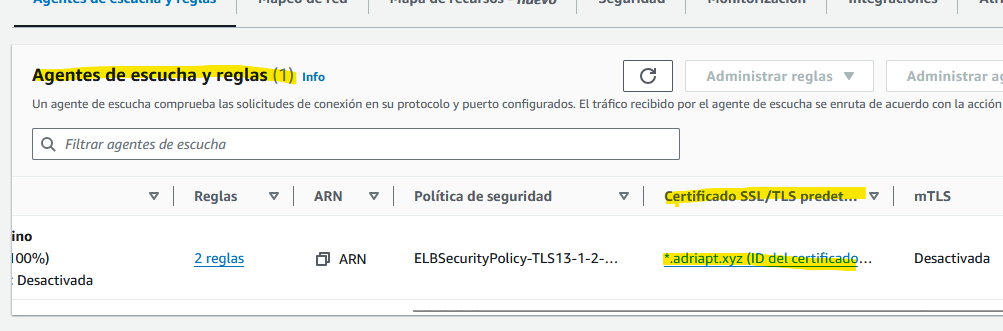
Once you have a certificate, you can configure it in your public facing instances to allow HTTPS connections. I configured my Load Balancer so it uses this TLS certificate:
Deploying new versions using Github Actions
Now that we have our AWS environment configured, it would be fantastic to automate the deployment of the new images instead of having to ssh and run the same commands each time a new version is deployed.
To do this we only need to add some more code in our github actions workflow. At this moment, the workflow creates and pushes new docker images to DockerHub. We just need to add some more actions so the new docker images are pulled to the corresponding EC2 instances and executed.
We will use the AWS CLI and use this commands to get the EC2 names. Then, we will use ssh actions to ssh into the EC2 and run a set of commands to:
- Stop the current container
- Remove the current container
- Pull the new image
- Execute a new container using this new image
We will do this for the backend and frontend instances. Please note that we will need to use some secrets like Access Keys.
1
2
3
4
5
6
7
8
9
10
11
12
13
14
15
16
17
18
19
20
21
22
23
24
25
26
27
28
29
30
31
32
33
34
35
36
37
38
39
40
41
42
43
44
45
46
47
48
49
50
51
52
53
54
55
56
  - name: Install AWS CLI
      run: |
        sudo apt-get update
        sudo apt-get install -y awscli

    - name: Configure AWS credentials
      run: |
        aws configure set aws_access_key_id ${{ secrets.AWS_ACCESS_KEY_ID }}
        aws configure set aws_secret_access_key ${{ secrets.AWS_SECRET_ACCESS_KEY }}
        aws configure set region ${{ secrets.AWS_REGION }}

    - name: Get EC2 Dns Names
      id: ec2_dns_names
      run: |
        API_Name=$(aws ec2 describe-instances --query "Reservations[*].Instances[?Tags[?Key=='Name' && Value=='RestaurantApp Web Server']].PublicDnsName" --output text)
        Frontend_Name=$(aws ec2 describe-instances --query "Reservations[*].Instances[?Tags[?Key=='Name' && Value=='frontend-web']].PublicDnsName" --output text)
        echo "::set-output name=api_name::$API_Name"
        echo "::set-output name=frontend_name::$Frontend_Name"

    - name: Validate EC2 DNS Names
      run: |
        if [ -z "${{ steps.ec2_dns_names.outputs.api_name }}" ]; then
          echo "Error: API_Name is empty"
          exit 1
        fi
        if [ -z "${{ steps.ec2_dns_names.outputs.frontend_name }}" ]; then
          echo "Error: Frontend_Name is empty"
          exit 1
        fi

    - name: Update API Docker image on EC2
      uses: appleboy/ssh-action@master
      with:
        host: ${{ steps.ec2_dns_names.outputs.api_name }}
        username: ${{ secrets.EC2_USERNAME }}
        key: ${{ secrets.SSH_AWS_KEY }}
        port: 22
        script: |
          sudo docker stop backend-container;
          sudo docker rm backend-container;
          sudo docker pull adriapt/backend;
          sudo docker run -d -p 8080:8080 --net my-network --name backend-container adriapt/backend;

    - name: Update Frontend Docker image on EC2
      uses: appleboy/ssh-action@master
      with:
        host: ${{ steps.ec2_dns_names.outputs.frontend_name }}
        username: ${{ secrets.EC2_USERNAME }}
        key: ${{ secrets.SSH_AWS_KEY }}
        port: 22
        script: |
          sudo docker stop frontend;
          sudo docker rm frontend;
          sudo docker pull adriapt/frontend;
          sudo docker run -d -p 80:80 --name frontend adriapt/frontend
With this addition to our workflows, with just one push to the github repository the code will be:
- Tested
- If it passes the tests, containerized and published in a Docker Hub
- Deployed into EC2 instances and executed