
Chapter 8: Vulnerability Scanning
Vulnerability Scanning is the process of detecting a known exploit/vulnerability when analyzing a victim. There are automated tools that do this process. They scan all the ports and identify the OS and services running, then, using techniques such as banner grabbing, they try to identify the version of those services and macth them with the signature of the known vulnerabilities. However, is common to have false positives and false negatives using these tools.
Nessus
Nessus is one of the most used automatic vulnerability scanners. It was an open source project, but the source was closed. In consequence, some forks of the original source became open source under the name of OpenVAS (or Greenbone). However, Nessus has a free version which we will use to run an automated scan.
Installing Nessus
We can install the corresponding package here. In my case I am going to use the .deb.
1
2
3
4
5
6
7
8
9
10
11
12
13
❯ sudo dpkg -i Nessus-10.3.0-debian9_amd64.deb
Selecting previously unselected package nessus.
(Reading database ... 0 files and directories currently installed.)
Preparing to unpack Nessus-10.3.0-debian9_amd64.deb ...
Unpacking nessus (10.3.0) ...
Setting up nessus (10.3.0) ...
Unpacking Nessus Scanner Core Components...
/var/lib/dpkg/info/nessus.postinst: line 34: deb-systemd-helper: command not found
/var/lib/dpkg/info/nessus.postinst: line 37: deb-systemd-helper: command not found
/var/lib/dpkg/info/nessus.postinst: line 44: deb-systemd-helper: command not found

 - You can start Nessus Scanner by typing /bin/systemctl start nessusd.service
 - Then go to https://FreeRaidr:8834/ to configure your scanner
As the output says, we can start the service doing sudo systemctl start nessusd.service:
1
2
3
4
5
6
7
8
9
10
11
12
13
14
15
16
❯ sudo systemctl start nessusd.service
❯ sudo systemctl status nessusd.service
● nessusd.service - The Nessus Vulnerability Scanner
     Loaded: loaded (/usr/lib/systemd/system/nessusd.service; disabled; preset: disabled)
     Active: active (running) since Tue 2022-07-26 08:56:23 UTC; 8s ago
   Main PID: 145862 (nessus-service)
      Tasks: 14 (limit: 7664)
     Memory: 114.9M
        CPU: 7.260s
     CGroup: /system.slice/nessusd.service
             ├─145862 /opt/nessus/sbin/nessus-service -q
             └─145863 nessusd -q

Jul 26 08:56:23 FreeRaidr systemd[1]: Started The Nessus Vulnerability Scanner.
Jul 26 08:56:24 FreeRaidr nessus-service[145863]: Cached 0 plugin libs in 0msec
Jul 26 08:56:24 FreeRaidr nessus-service[145863]: Cached 0 plugin libs in 0msec
Now we can open our browser and go to https://localhost:8834. When trying to access this web page, we will have an error indicating an unknown certificate issuer, because its SSL certificate is self-signed. Since we know it is not a dangerous application, we will accept the risk.
Next step is to choose what type of product we will be using, which will be Nessus Essentials. 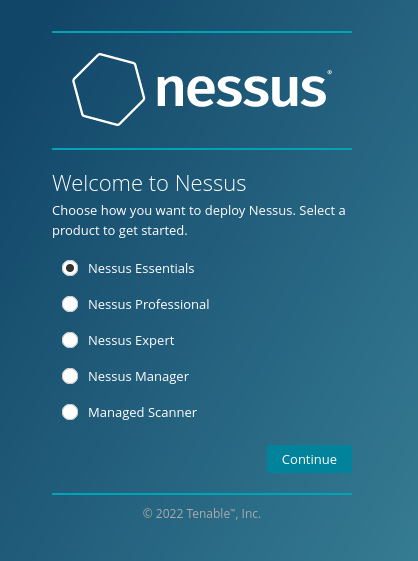
Now we will need to fill the required information to receive an activation code in our email. Once we have it, we will be able to activate the product and create a User Account. Once the previous steps have been done, nessus will start to download plugins.
Now we will define our target. Nessus supports different types of scan such as:
- Basic Network Scan: Generic scan with several checks to be used against various target types.
- Credentialed Patch Audit: Authenticated (The scanner has access to a user) scan to enumerate missing patches.
- Web Application Tests: Specialized scan for discovering known web vulnerabilities.
- Spectre and Meltdown: Targeted scan for Spectre and Meltdown vulnerabilities
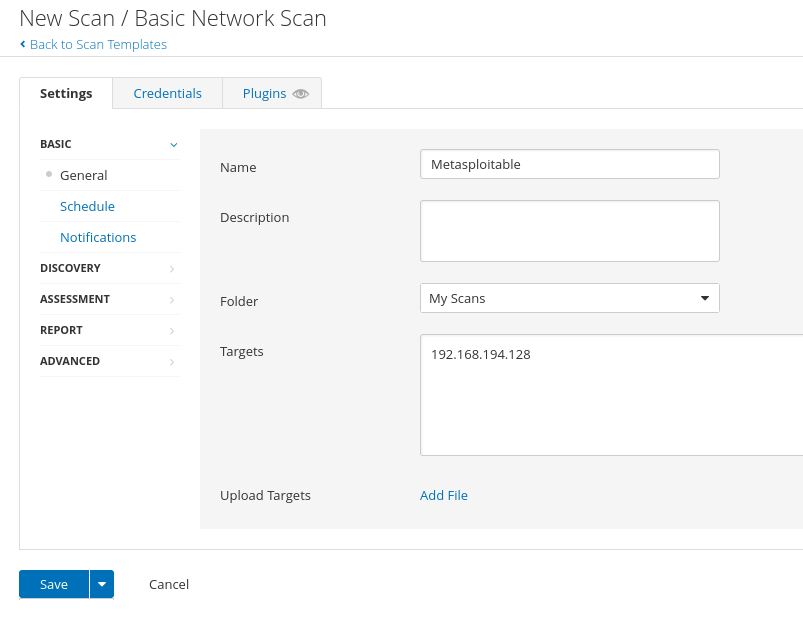
We are going to click New Scan and then Basic Network Scan. Now we will need to provide all the required arguments to execute the scan. I downloaded the Metasploitable VM machine to have a victim host where we can throw the scan.
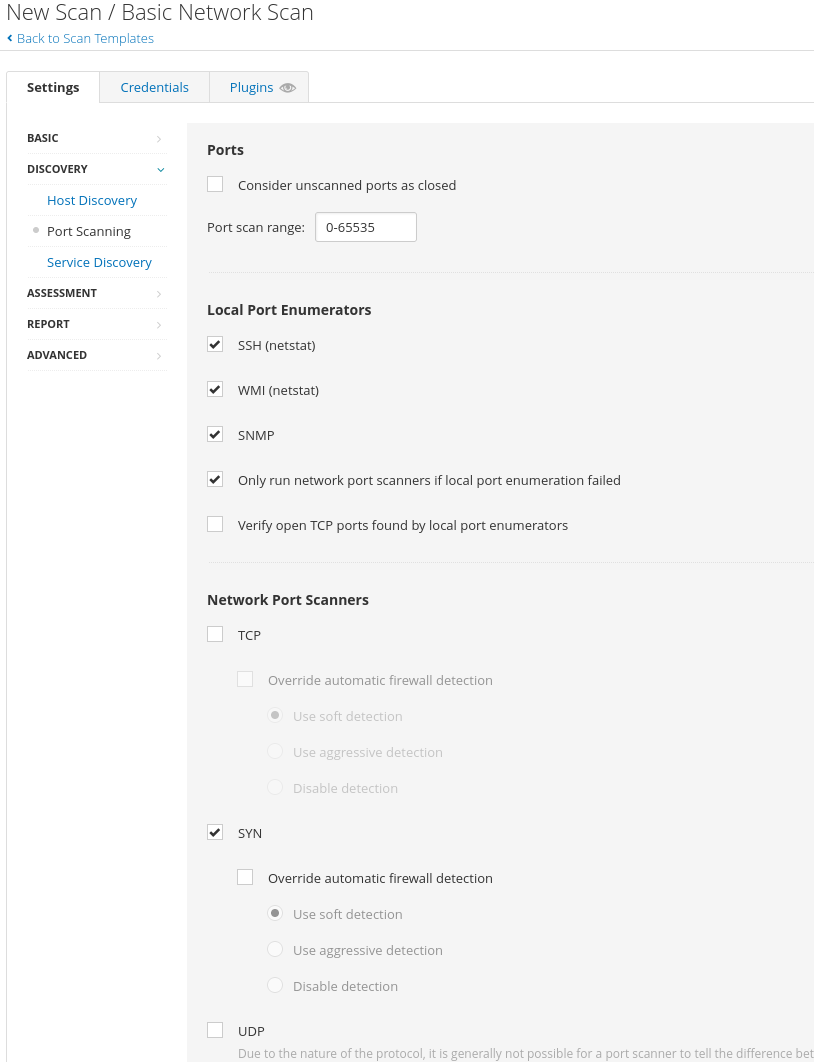
The Basic Network Scan comes with a predefined configuration, however, we may want to change some values. For example, the predefined configuration defines that only the common ports will be scanned, but we want to scan all of them. To change this we will go to the Discovery tab and change the value of the scan type to Custom. This will add new tabs under the discovery tab. We will go to Port Scanning and we will see several options to define how we want to do the port scan.
We will first change the Port scan range and put the value 0-65535 (all ports).
Now we will click the drop-down menu under the Save button and use the Launch to throw the scan.
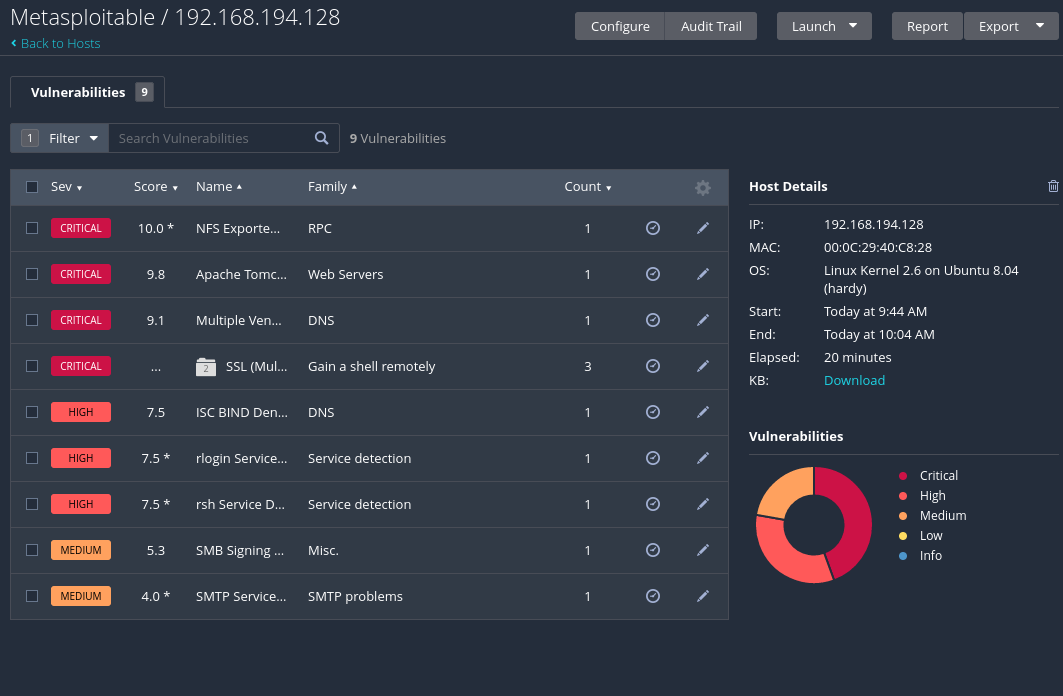
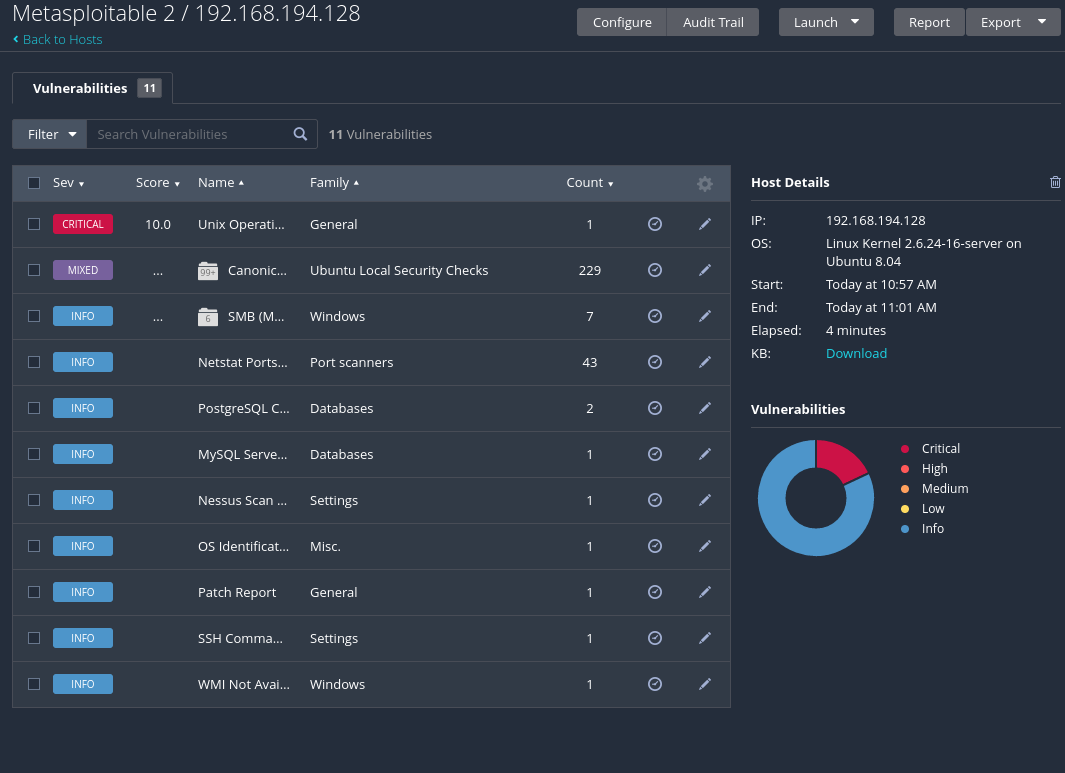
This might take some time to execute. Since the Metasploitable machine has a lot of vulnerabilities on purpose, the scan will find a lot of things to expose.
Once the scan is completed, we can click on the scan name to show the results. If we click on the IP address we can see the vulnerabilities discovered in that target. We are able to filter the vulnerabilities by severity, exploitability, CVE, etc.
Nessus define some groups where some related vulnerabilities are grouped, but if we want to see all the vulnerabilities on a single page, we can disable this grouping format. The example below shows all the vulnerabilities with the filtered with the Exploit Available is equal to true filter.
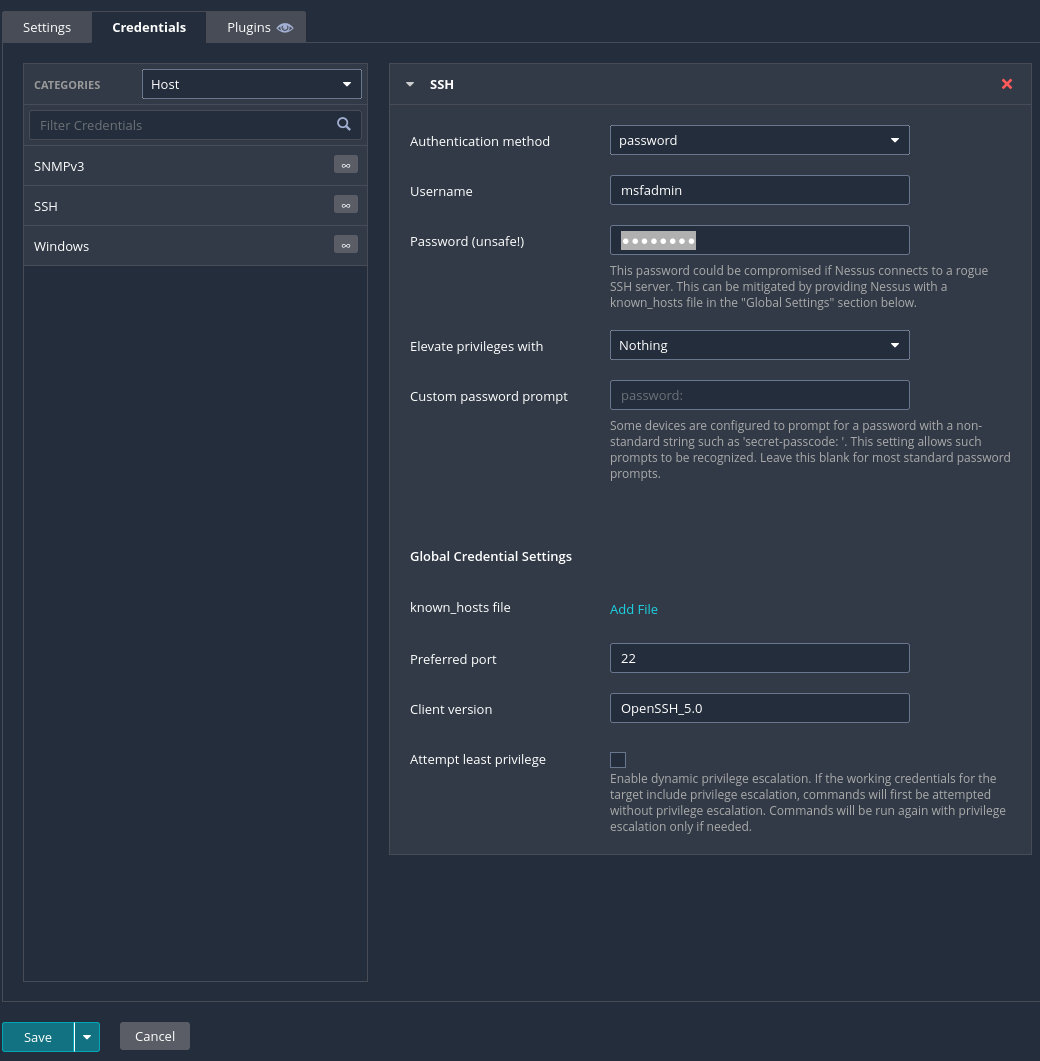
If we want to search for more vulnerabilities inside the host, we want to provide nessus with some credentials to access it. To do this we will do another scan, but this time we are going to select Credentialed Patch Audit
We will need to provide again the IP and a name for the scan. However, now we will go to the Credentials tab and add the ssh credentials. Since I’m using the metasploitable machine, the default credentials are msfadmin:msfadmin. Since we want to use password authentication we have to select the corresponding method.
Now we can launch the attack as we did in the first scan and wait for the results.
Nessus Plugins
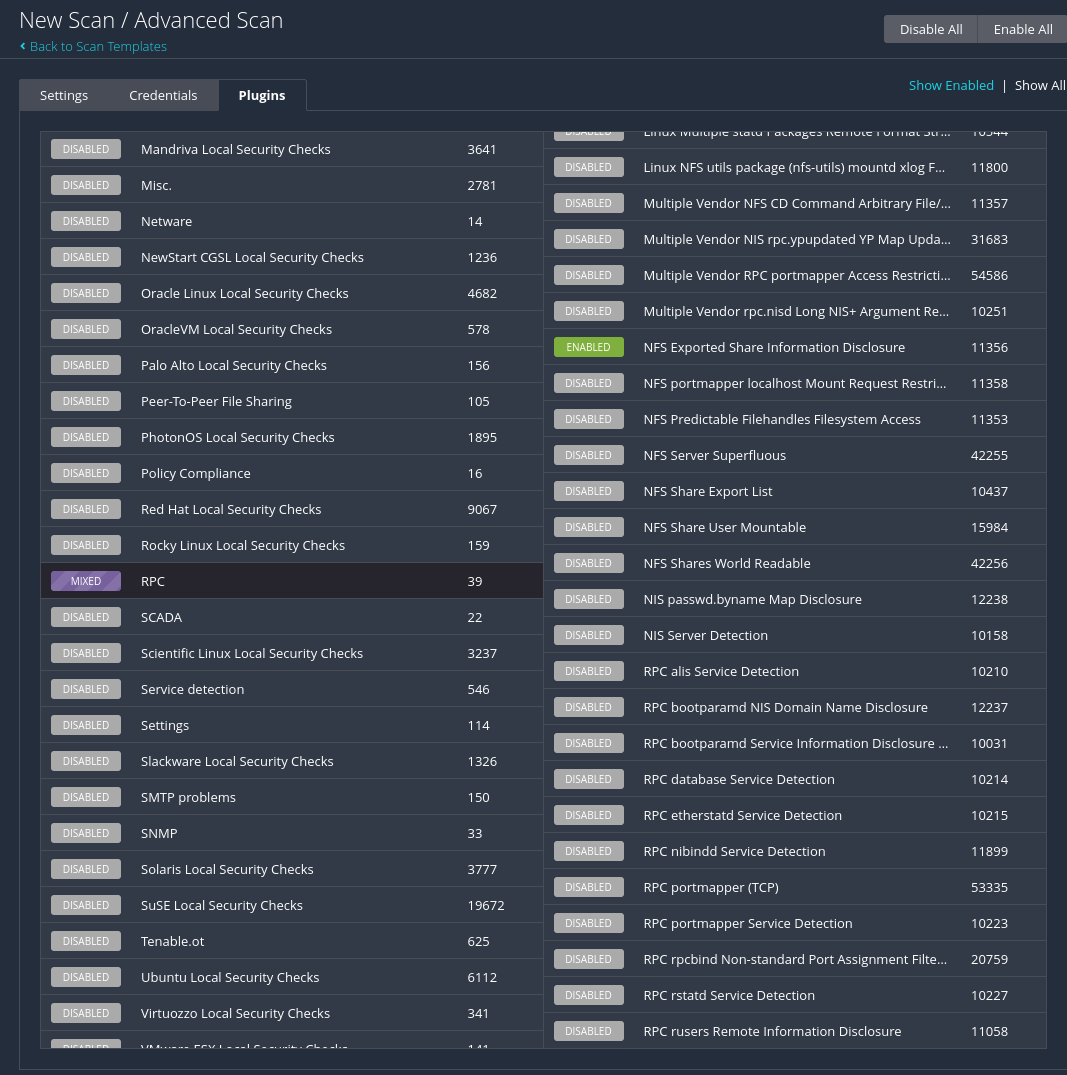
By default, Nessus enables a number of plugins when running a default scan, but we can define some other plugins to do a specific scan or search for a specific vulnerability. To do this we are going to create a New Scan but this time selecting the Advanced Scan configuration. Now we will go to the Plugins tab and we will see all the enabled plugins. We can disable them using the Disable All button.
If we want to scan for a specific vulnerability, for example the NFS Exported Share Information Disclosure we will go to the RPC tab in the left column and several plugins will be displayed on the right column, where we will select the NFS Exported Share Information Disclosure, with the ID: 11356.
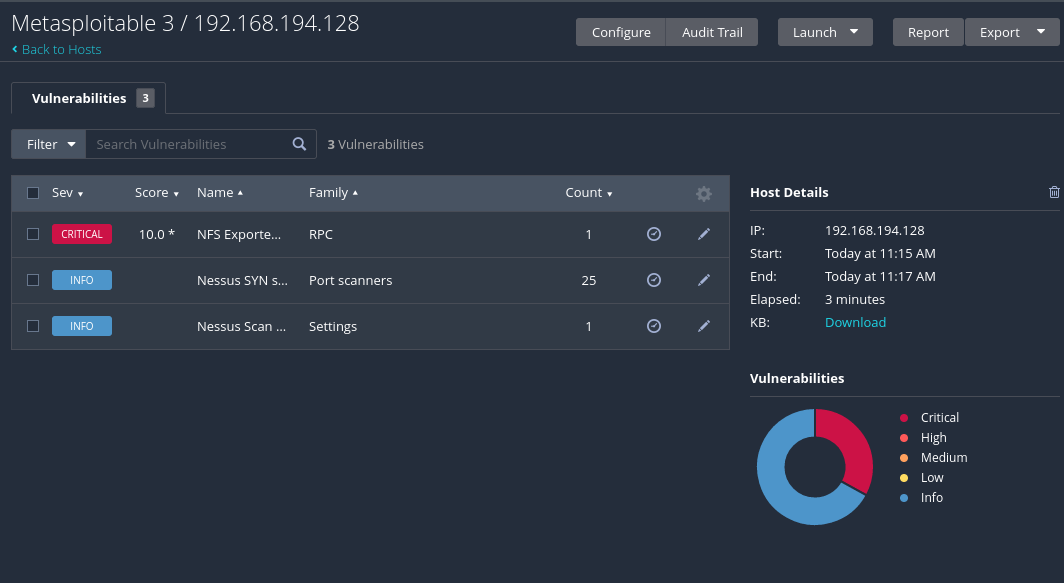
Now we can launch the scan and wait for the results. We can see that it is vulnerable.
Using Nmap
Nmap can also scan for vulnerabilities using the Nmap Script Engine (NSE). These scripts are written in Lua. Some scripts can exploit the vulnerability and they may destroy the host, this is why the scripts are categorized as safe or intrusive.
If we keep using the Metasploitable machine as an example, we can scan for vulnerabilities using: sudo nmap --script vuln 192.168.194.128
This is a short extract of the huge output:
1
2
3
4
5
6
7
8
9
10
11
12
13
14
15
16
17
18
19
20
21
22
23
24
25
26
27
28
29
30
31
32
33
34
35
36
37
38
39
40
41
42
43
44
45
46
47
48
49
50
51
52
53
54
55
56
57
58
59
60
61
62
63
64
65
66
67
68
69
70
71
72
73
74
75
76
77
78
79
80
81
82
83
84
85
86
87
88
89
90
91
92
93
94
95
96
97
98
99
100
101
102
103
104
105
106
107
108
109
110
111
112
113
114
115
116
117
118
119
120
❯ sudo nmap --script vuln 192.168.194.128
passwd:
Starting Nmap 7.92 ( https://nmap.org ) at 2022-07-26 11:26 UTC
Pre-scan script results:
| broadcast-avahi-dos:
|   Discovered hosts:
|     224.0.0.251
|   After NULL UDP avahi packet DoS (CVE-2011-1002).
|_  Hosts are all up (not vulnerable).

Nmap scan report for 192.168.194.128
Host is up (0.00047s latency).
Not shown: 977 closed tcp ports (reset)
PORT     STATE SERVICE
21/tcp   open  ftp
| ftp-vsftpd-backdoor:
|   VULNERABLE:
|   vsFTPd version 2.3.4 backdoor
|     State: VULNERABLE (Exploitable)
|     IDs:  BID:48539  CVE:CVE-2011-2523
|       vsFTPd version 2.3.4 backdoor, this was reported on 2011-07-04.
|     Disclosure date: 2011-07-03
|     Exploit results:
|       Shell command: id
|       Results: uid=0(root) gid=0(root)
|     References:
|       http://scarybeastsecurity.blogspot.com/2011/07/alert-vsftpd-download-backdoored.html
|       https://github.com/rapid7/metasploit-framework/blob/master/modules/exploits/unix/ftp/vsftpd_234_backdoor.rb
|       https://cve.mitre.org/cgi-bin/cvename.cgi?name=CVE-2011-2523
|_      https://www.securityfocus.com/bid/48539
22/tcp   open  ssh
23/tcp   open  telnet
25/tcp   open  smtp
|_sslv2-drown: ERROR: Script execution failed (use -d to debug)
| ssl-dh-params:
|   VULNERABLE:
|   Anonymous Diffie-Hellman Key Exchange MitM Vulnerability
|     State: VULNERABLE
|       Transport Layer Security (TLS) services that use anonymous
|       Diffie-Hellman key exchange only provide protection against passive
|       eavesdropping, and are vulnerable to active man-in-the-middle attacks
|       which could completely compromise the confidentiality and integrity
|       of any data exchanged over the resulting session.
|     Check results:
|       ANONYMOUS DH GROUP 1
|             Cipher Suite: TLS_DH_anon_WITH_AES_128_CBC_SHA
|             Modulus Type: Safe prime
|             Modulus Source: postfix builtin
|             Modulus Length: 1024
|             Generator Length: 8
|             Public Key Length: 1024
|     References:
|       https://www.ietf.org/rfc/rfc2246.txt
|
|   Transport Layer Security (TLS) Protocol DHE_EXPORT Ciphers Downgrade MitM (Logjam)
|     State: VULNERABLE
|     IDs:  BID:74733  CVE:CVE-2015-4000
|       The Transport Layer Security (TLS) protocol contains a flaw that is
|       triggered when handling Diffie-Hellman key exchanges defined with
|       the DHE_EXPORT cipher. This may allow a man-in-the-middle attacker
|       to downgrade the security of a TLS session to 512-bit export-grade
|       cryptography, which is significantly weaker, allowing the attacker
|       to more easily break the encryption and monitor or tamper with
|       the encrypted stream.
|     Disclosure date: 2015-5-19
|     Check results:
|       EXPORT-GRADE DH GROUP 1
|             Cipher Suite: TLS_DHE_RSA_EXPORT_WITH_DES40_CBC_SHA
|             Modulus Type: Safe prime
|             Modulus Source: Unknown/Custom-generated
|             Modulus Length: 512
|             Generator Length: 8
|             Public Key Length: 512
|     References:
|       https://weakdh.org
|       https://cve.mitre.org/cgi-bin/cvename.cgi?name=CVE-2015-4000
|       https://www.securityfocus.com/bid/74733
|
|   Diffie-Hellman Key Exchange Insufficient Group Strength
|     State: VULNERABLE
|       Transport Layer Security (TLS) services that use Diffie-Hellman groups
|       of insufficient strength, especially those using one of a few commonly
|       shared groups, may be susceptible to passive eavesdropping attacks.
|     Check results:
|       WEAK DH GROUP 1
|             Cipher Suite: TLS_DHE_RSA_WITH_DES_CBC_SHA
|             Modulus Type: Safe prime
|             Modulus Source: postfix builtin
|             Modulus Length: 1024
|             Generator Length: 8
|             Public Key Length: 1024
|     References:
|_      https://weakdh.org
| smtp-vuln-cve2010-4344:
|_  The SMTP server is not Exim: NOT VULNERABLE
| ssl-poodle:
|   VULNERABLE:
|   SSL POODLE information leak
|     State: VULNERABLE
|     IDs:  BID:70574  CVE:CVE-2014-3566
|           The SSL protocol 3.0, as used in OpenSSL through 1.0.1i and other
|           products, uses nondeterministic CBC padding, which makes it easier
|           for man-in-the-middle attackers to obtain cleartext data via a
|           padding-oracle attack, aka the "POODLE" issue.
|     Disclosure date: 2014-10-14
|     Check results:
|       TLS_RSA_WITH_AES_128_CBC_SHA
|     References:
|       https://www.imperialviolet.org/2014/10/14/poodle.html
|       https://www.openssl.org/~bodo/ssl-poodle.pdf
|       https://cve.mitre.org/cgi-bin/cvename.cgi?name=CVE-2014-3566
|_      https://www.securityfocus.com/bid/70574
53/tcp   open  domain
80/tcp   open  http
| http-enum:
|   /tikiwiki/: Tikiwiki
|   /test/: Test page
|   /phpinfo.php: Possible information file
|   /phpMyAdmin/: phpMyAdmin
|   /doc/: Potentially interesting directory w/ listing on 'apache/2.2.8 (ubuntu) dav/2'